Some Disassembly Required
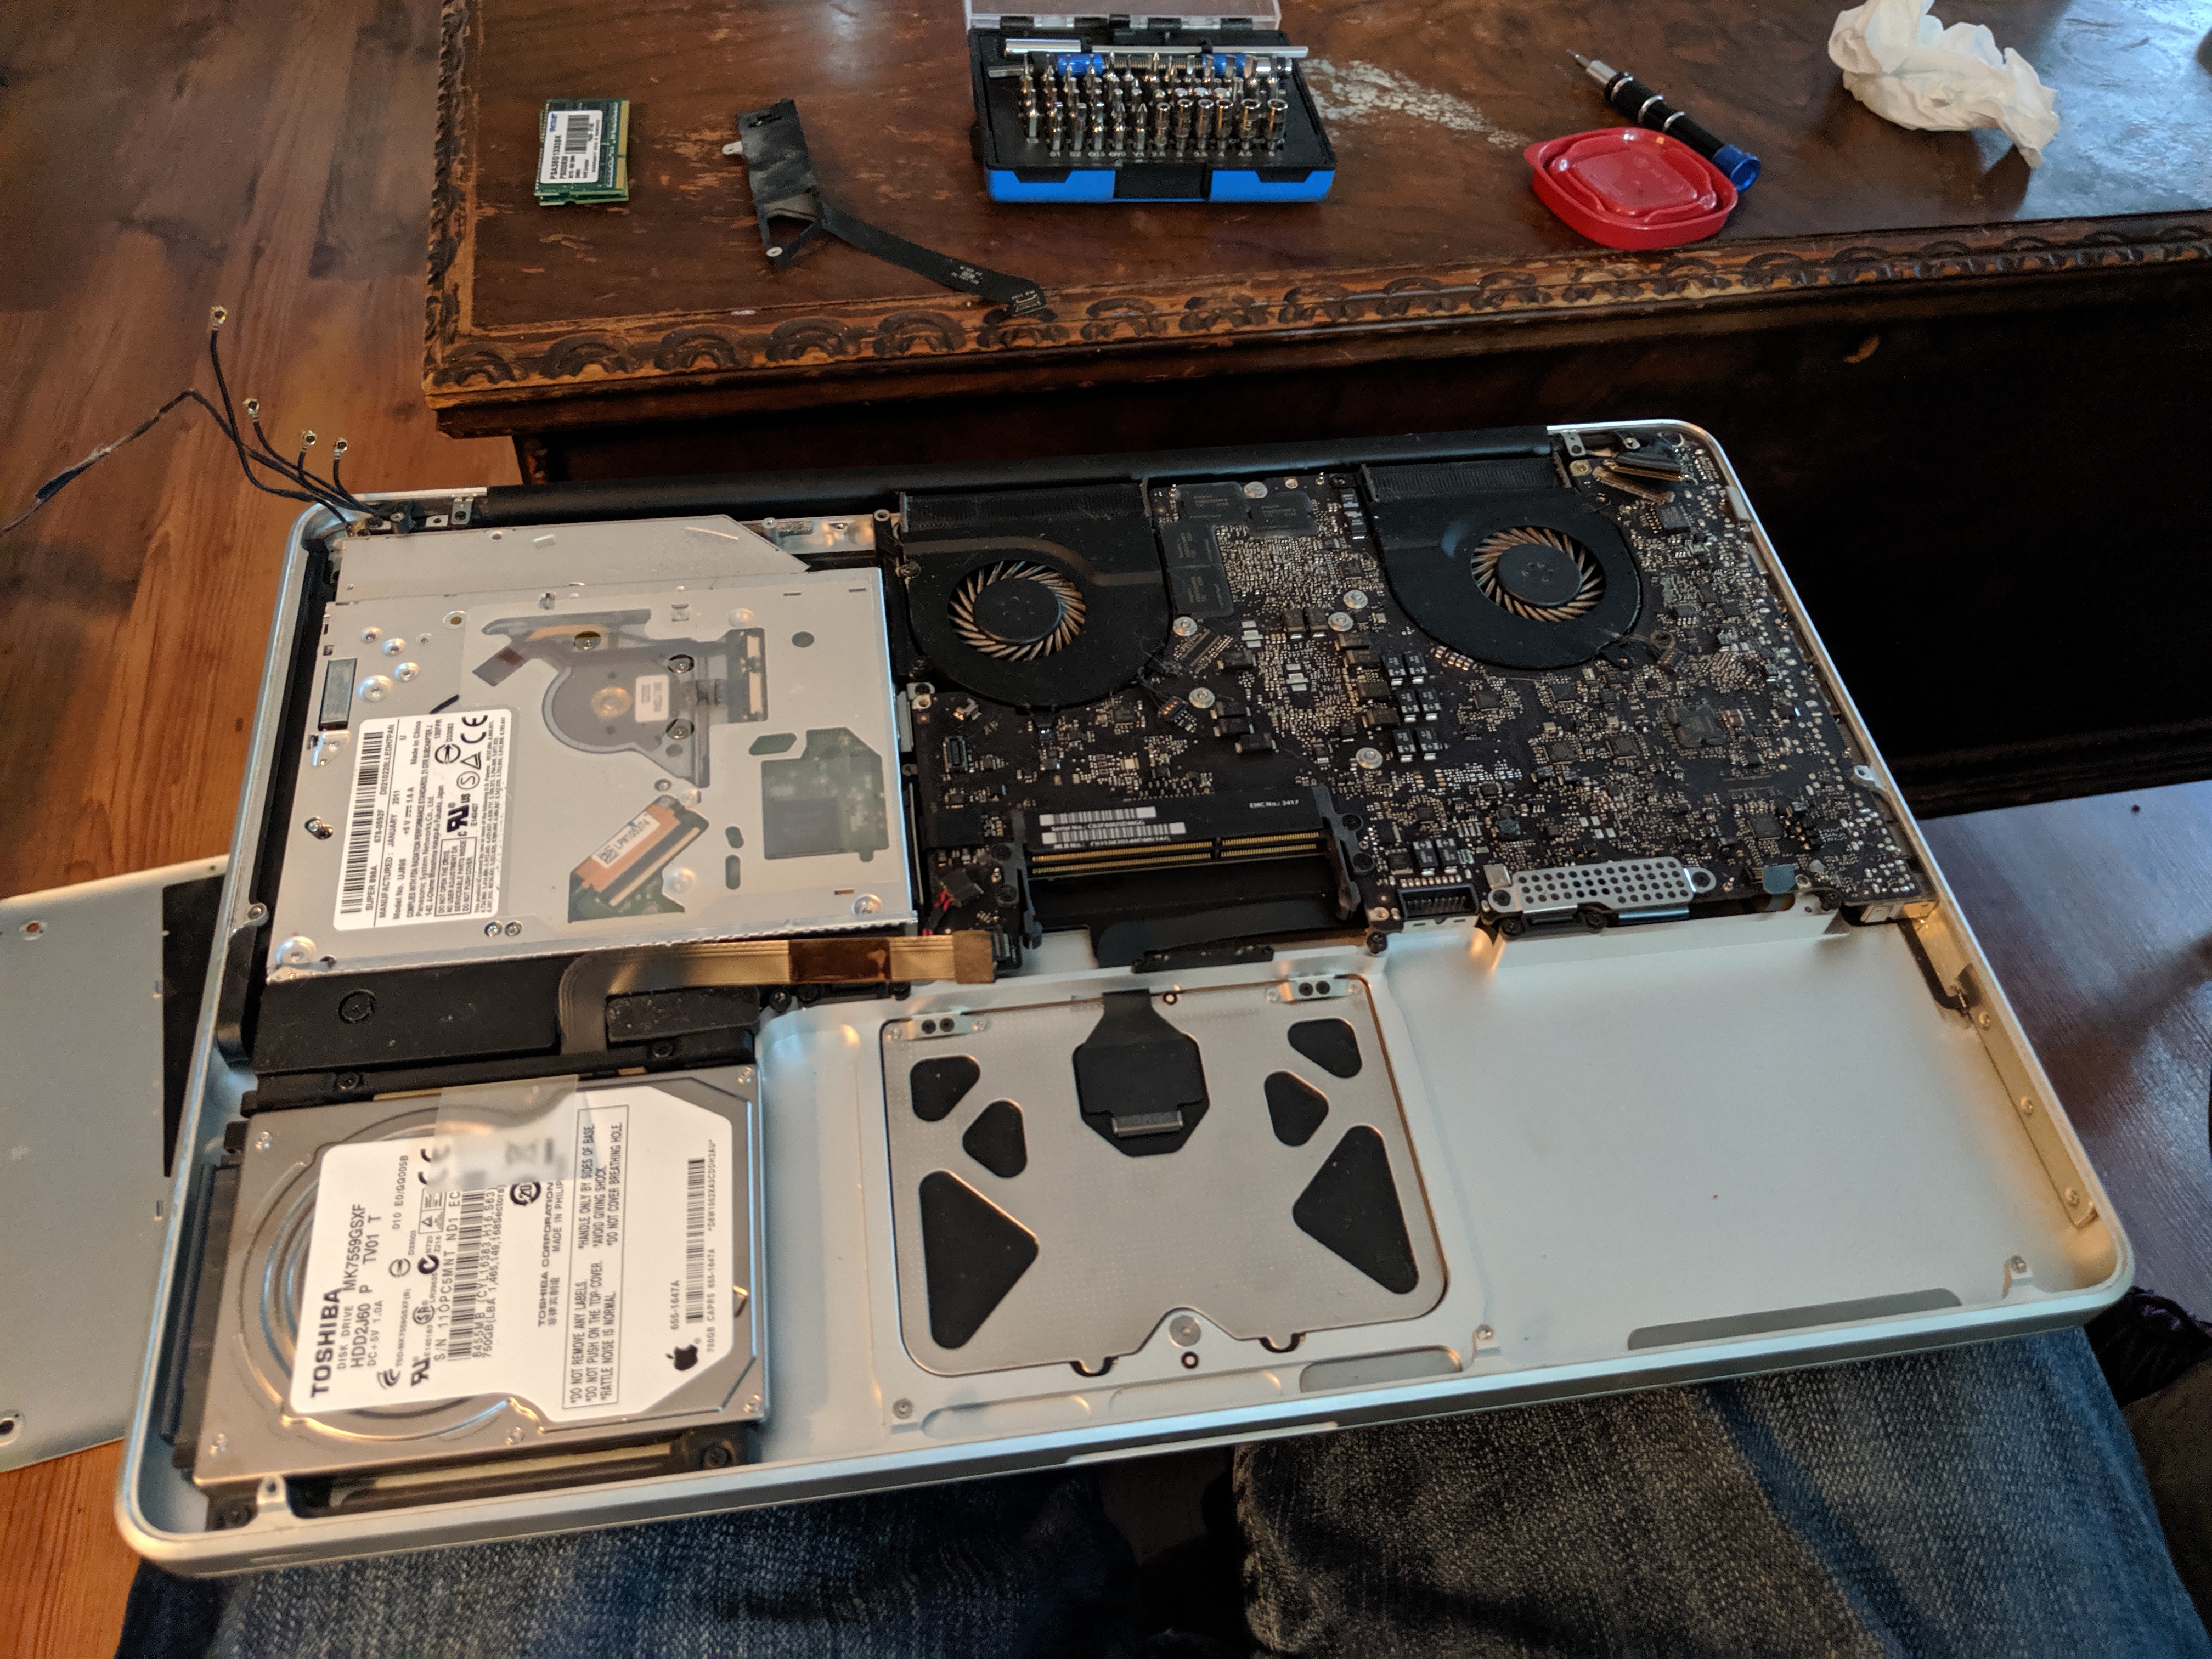
The first and easiest step: tearing apart the computer. I actually did this a while ago and I’m only just now starting to write about the project. I won’t go into detail on the process, there are plenty of teardown guides out there for this machine that do a great job on how to remove and replace components. All I really did was unscrew everything in sight with a philips or torx screwdriver, then pulled out the components one by one. Nothing was glued down or really hard to remove; it was a quick and easy process.
Here’s what it looked like after opening up the computer (minus the bloated corpse of its battery):
After removing pretty much everything:
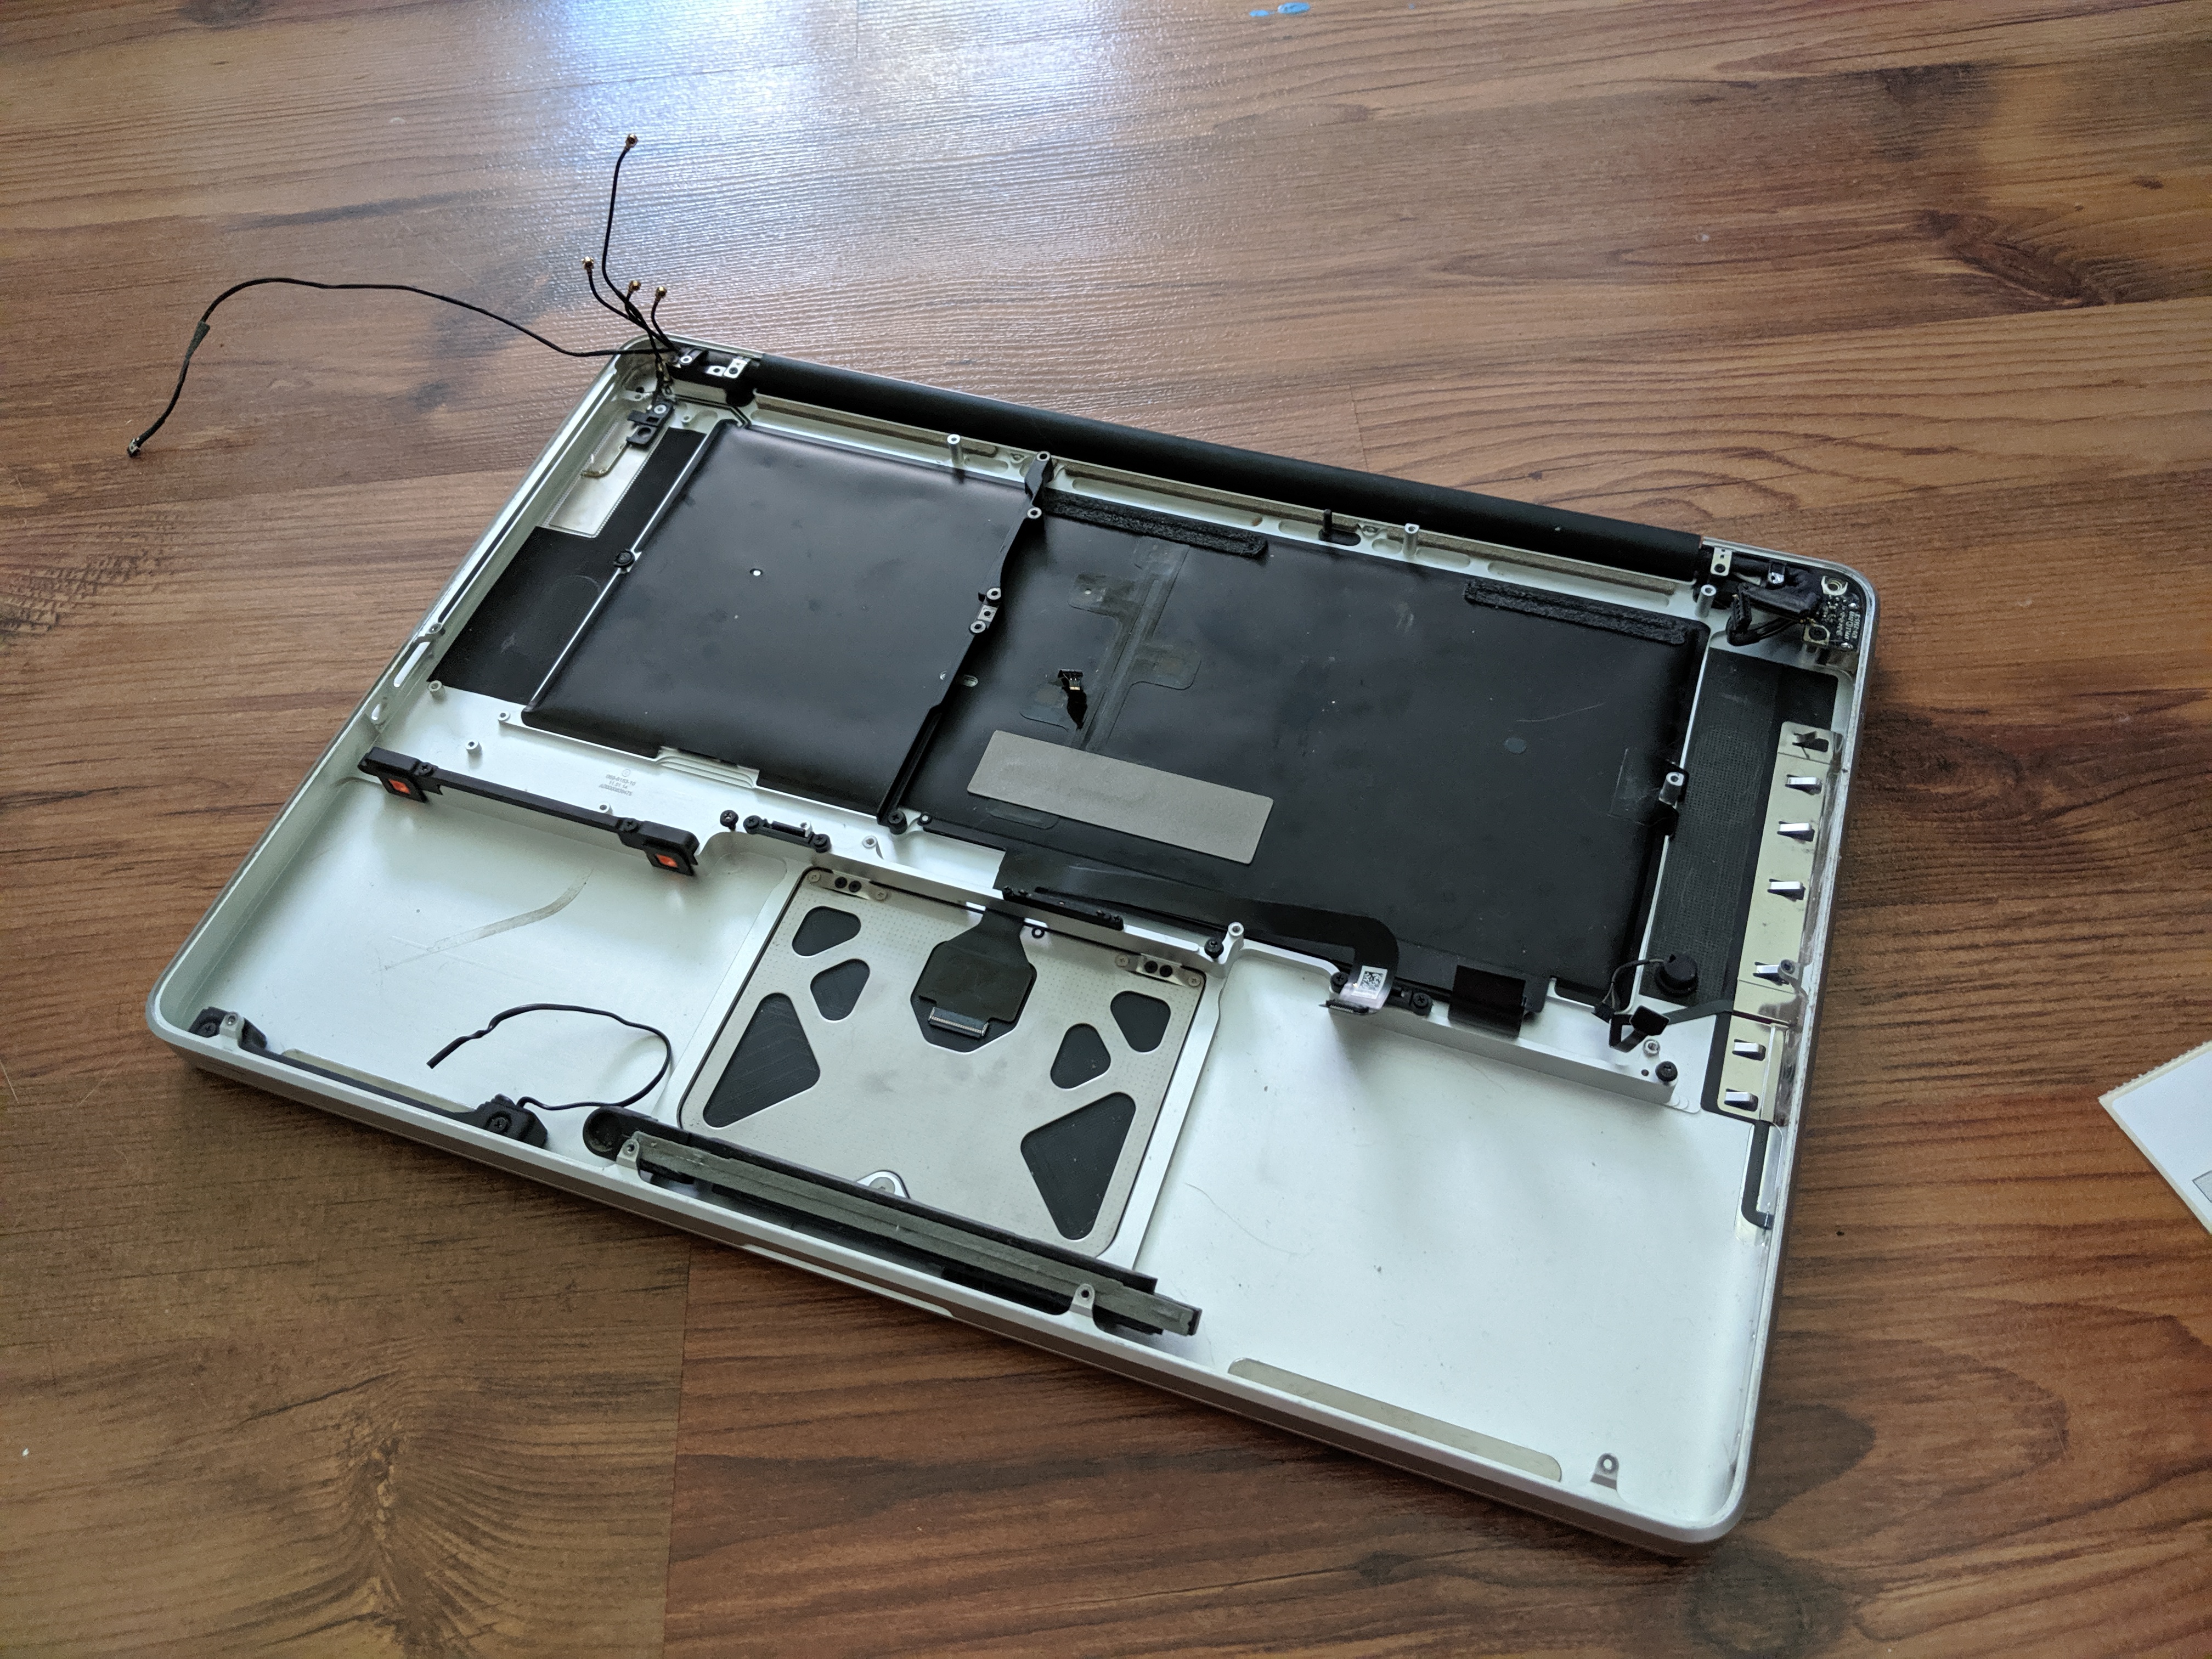
Now that the old components are in a better place I have a much better idea of what I’m working with. From the above image we can see the LVDS display cable in the top right along with the power input circuit. The keyboard and trackpad cables for their respective units can be seen in the middle right side as well. The wires in the top left are antennas from the Bluetooth/WIFI board. I may end up using them later so they can stay for now.
From here on out I have to determine how I will interface the Raspberry Pi with each of the remaining components, and I need to figure out how to power everything. Easy right?